Check Step by Step Procedure to Convert PST File
Step 1: Download, install, and run PST Converter.
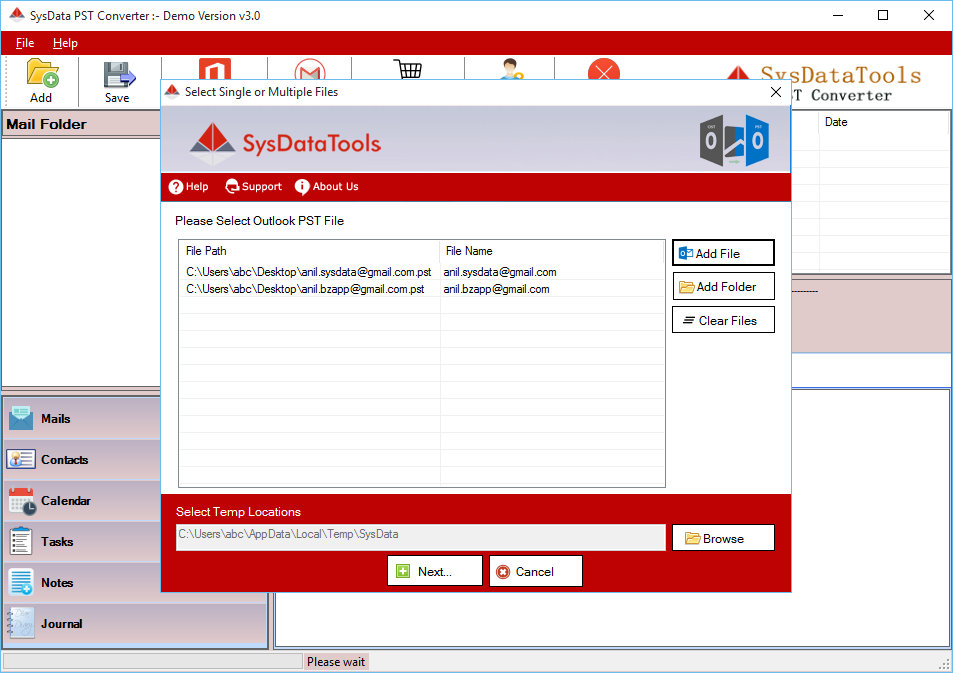
Step 2: Check Preview of PST file contents.

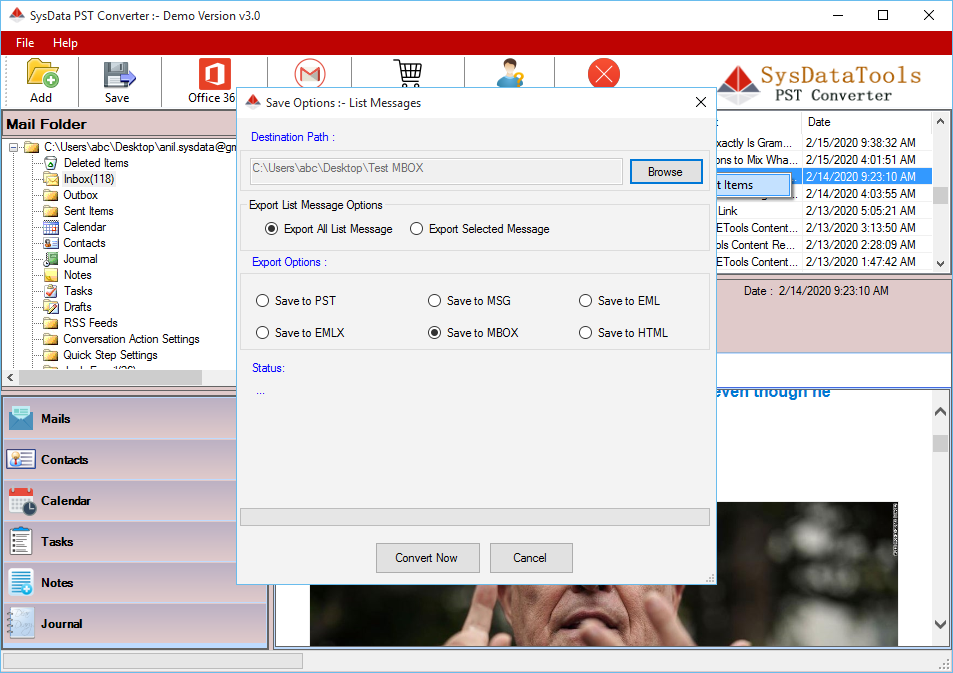
Step 3: To export list items,
Right-click on right-hand screen and hit "Export List Items"
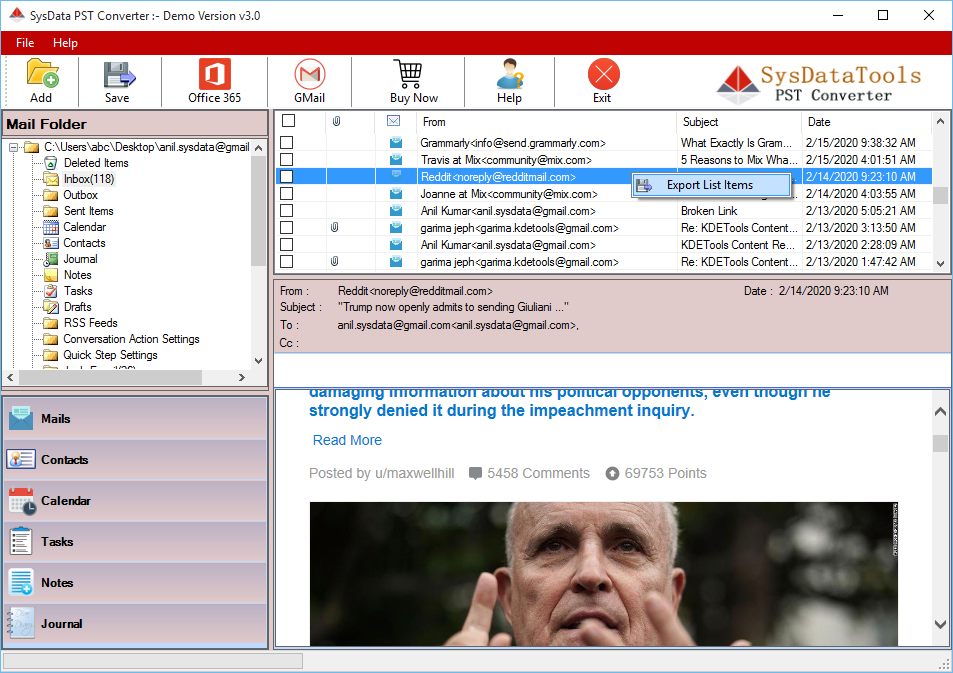
Step 4: Select required export list messages option:
- Export All List Message
- Export Selected Message
Select MBOX as export option and click on the "Convert Now" button.
Step 5: Export complete PST items to MBOX file format.
From Menu, click Save.
- Select destination path.
- Select MBOX as export option.
- For merging all folders into single MBOX, select checkmark box labeled "Merge All Items to Single File".
- Optional: To filter messages as per date, select this option and enter required date range.
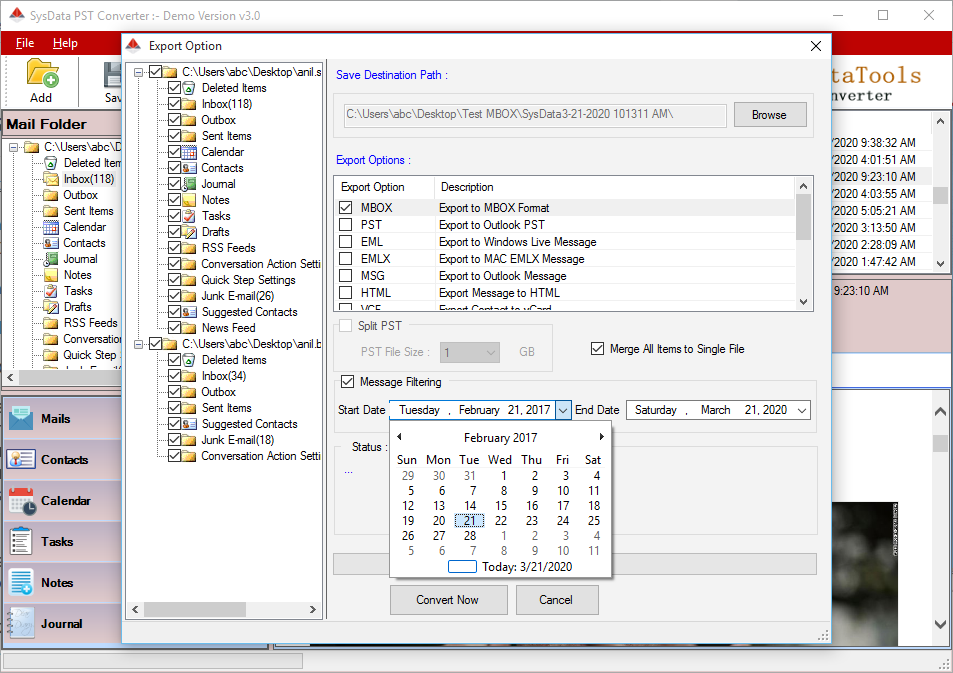
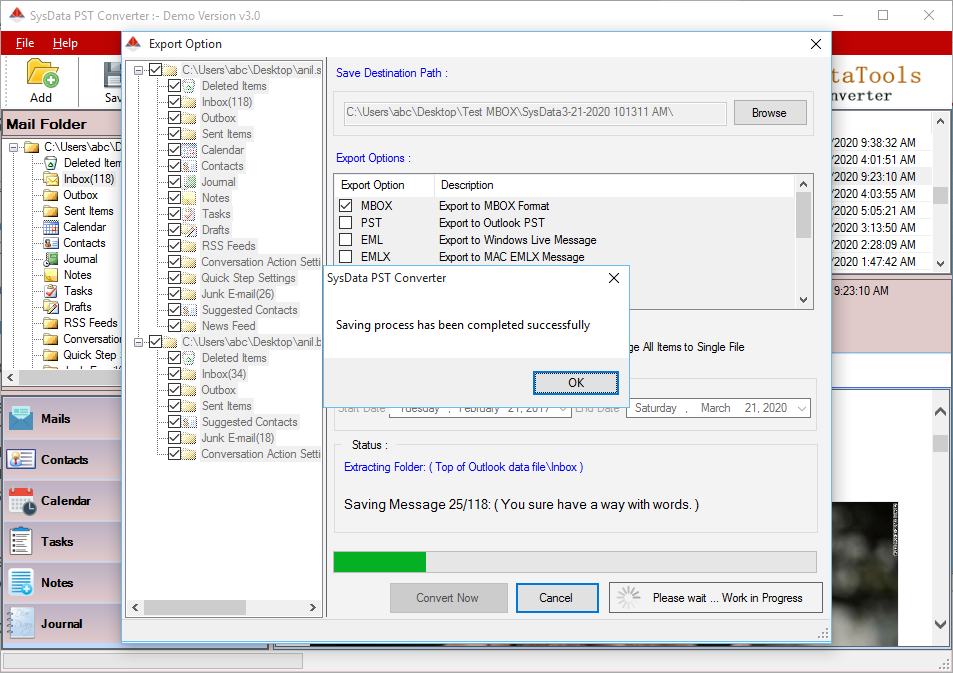
Step 6: Click on "Convert Now" button to start PST to MBOX Conversion process.
Step 7:For Office 365,
- Click on Office 365 icon from the menu of the software.
- Enter User Name/ Email ID and Password.
- To filter messages, check box labelled Message Filtering and select required Date range.
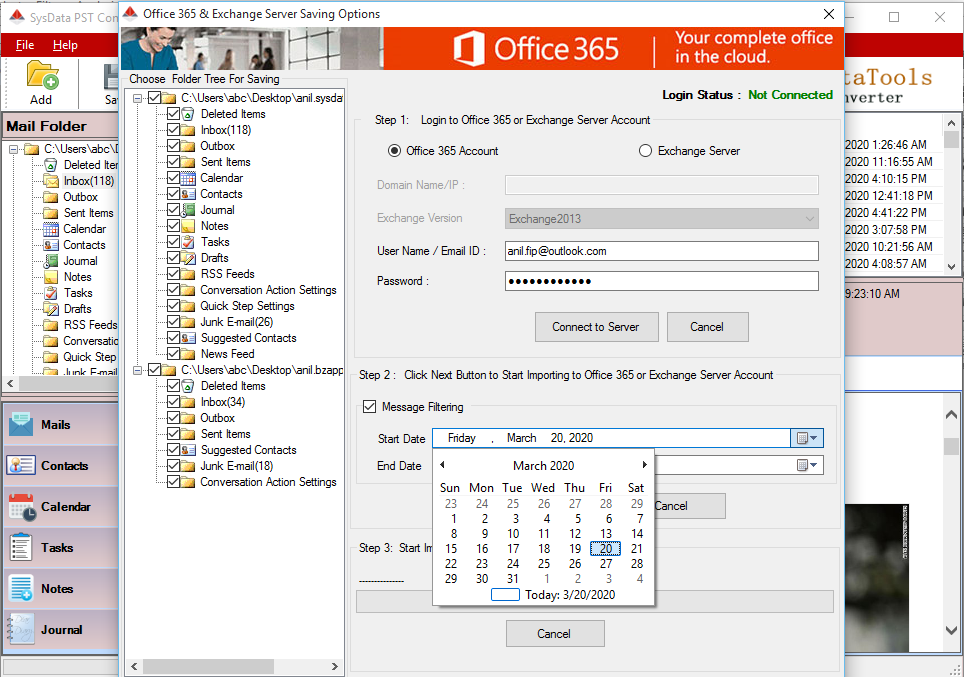
Step 8: Click on Start Processing button to import PST file to Office 365 account.

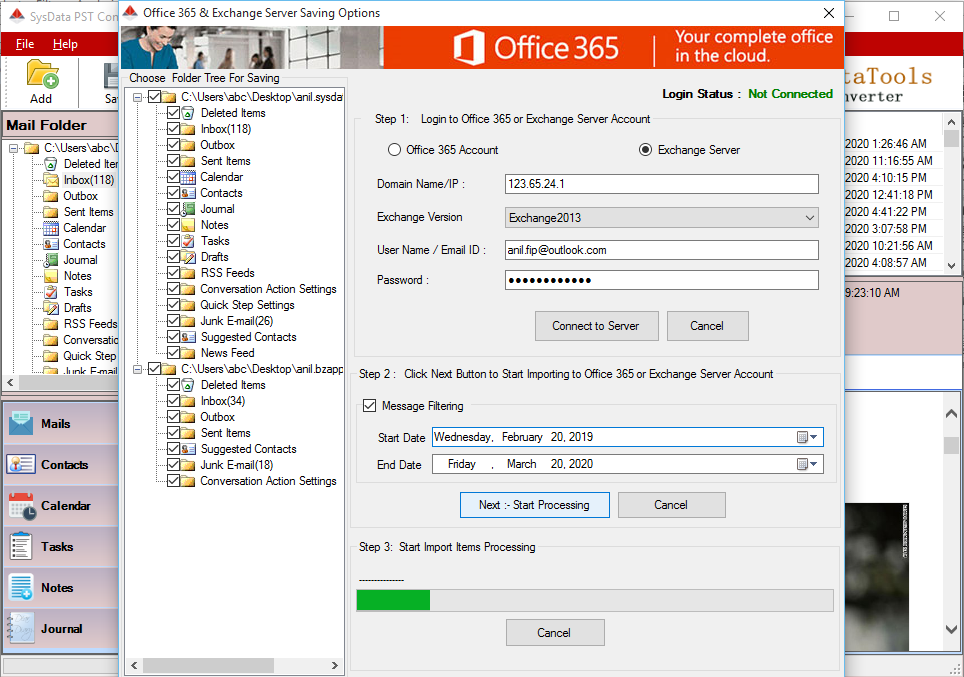
Step 9: For Exchange Server,
- Click on Office 365 icon from the menu of the software.
- Enter Domain Name/IP, User Name/ Email ID, and Password.
- To filter messages, check box labelled Message Filtering and select required Date range.

Step 10: Click on Start Processing button to import PST file to Live Exchnage Server account.
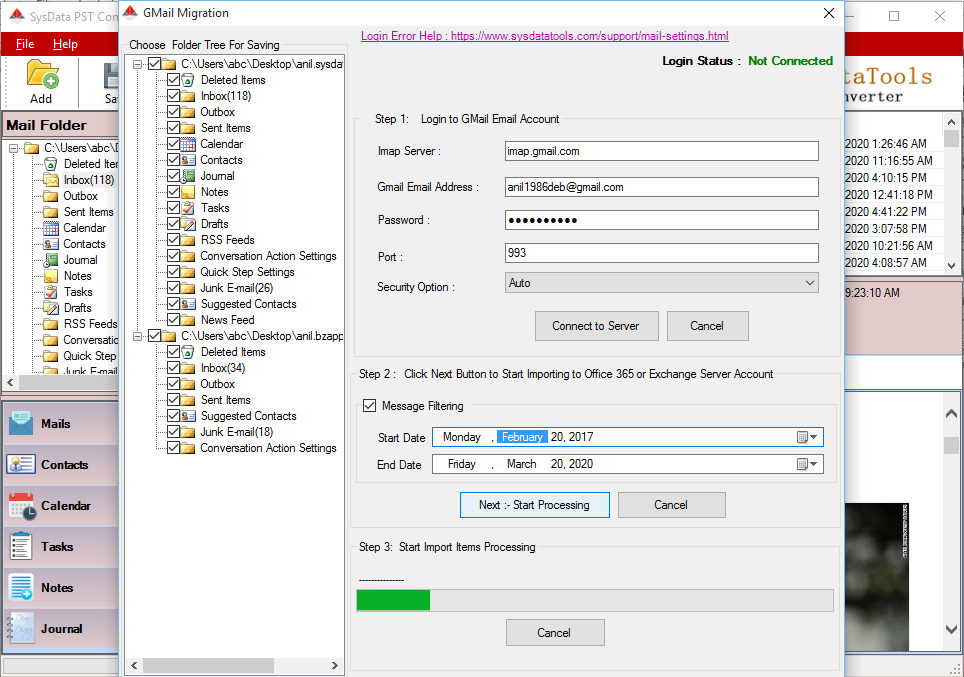
Step 11: For Gmail Account,
- Click on Gmail icon from the menu of the software.
- Enter GMail Address, and Password.
- To filter messages, check box labelled Message Filtering and select required Date range.
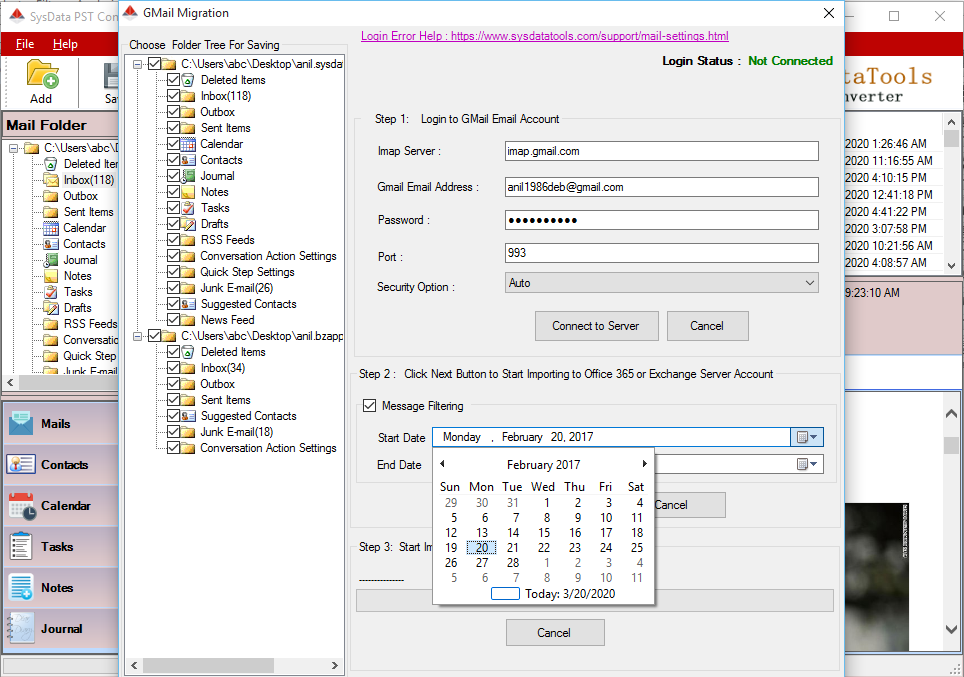
Step 12: Click on Start Processing button to import PST file to Gmail account.